 JojoGS.DEV
 English
 Français
Who to Pick with the SSR Selector
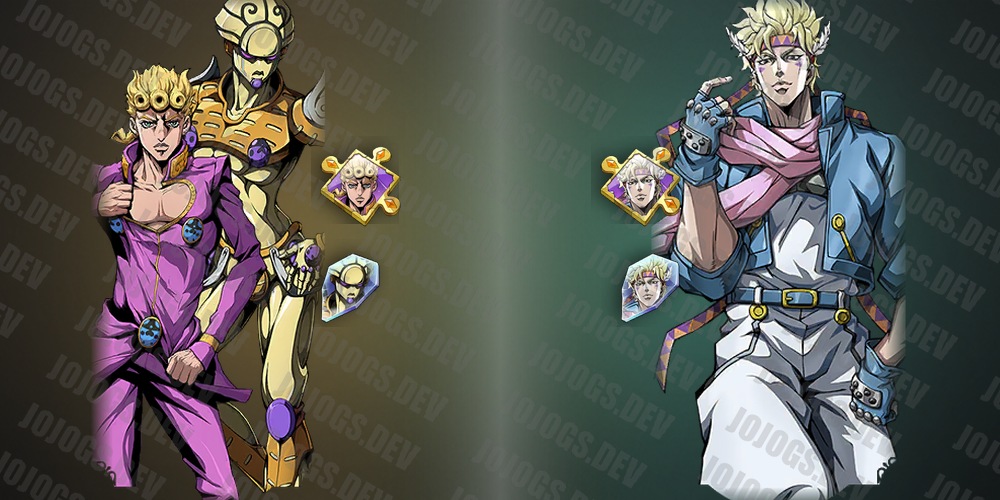
The ten characters you can actually guarantee through the game's permanent selector pools: who's worth a character duplicate, who's worth an ability duplicate for their second Ultimate, and why.
Every duplicate you pull pays into two ladders at once:  Character Shards toward Star rank, and
  Stand Shards toward that character’s own Stand ladder, 60 of each per duplicate. Before weighing which ladder to prioritize for any one character, the actual first priority is simpler: own every character. You can’t spend a Shard on someone you haven’t pulled yet.
The permanent pools make targeting reliable
Most SSR duplicates come down to luck. The exception is the game’s two permanent recruitment pools, always available rather than tied to a limited-time banner: Standard Character for characters, and Standard Ability for ability shards. Both guarantee a random SSR (or SSR ability shard) every 60 pulls, and both carry a second, much stronger guarantee on top of that:
- Standard Character: at 180 and again at 300 cumulative pulls, you pick rather than roll, from a fixed list of ten characters.
- Standard Ability: the same ten-character list, picked at 150 cumulative pulls, plus a 5-slot wishlist that boosts your odds of pulling their ability shards before you even reach that milestone.
The ten characters on both selector lists:
Caesar Anthonio Zeppeli ,
Mohammed Avdol
,
Mohammed Avdol ,
Koichi Hirose
,
Koichi Hirose ,
Giorno Giovanna
,
Giorno Giovanna ,
Bruno Bucciarati
,
Bruno Bucciarati ,
Prosciutto
,
Prosciutto ,
Diavolo
,
Diavolo ,
Cioccolata
,
Cioccolata ,
F.F.
,
F.F. , and
Ermes Costello
, and
Ermes Costello .
.
That’s why the picks below lean on this list specifically: these are the SSRs you can actually plan toward, not just hope for. Outside it, a specific SSR still comes down to whatever their own limited banner or the wider random pool gives you.
Character duplicates: who to prioritize
Giorno Giovanna’s duplicate is the single best pick on the list. It’s what unlocks Life Energy Detection early, the ability his Support role is actually built on. Without it he’s just a very good healer; with it he’s S+ in both roles at once, off one cheap, early star.
After Giorno, a first duplicate of Caesar Anthonio Zeppeli or Koichi Hirose is worth taking too. Past those three, there’s no fixed order: follow the tier list, and put duplicates into whichever currently strong character actually fills the role your roster is missing, rather than chasing a specific name.
Ability shards: who to prioritize
The Stand ladder’s early stages mostly just scale numbers you already have. The one exception worth planning around: reaching what players call S1, the very first stage, costing 60 ability shards and needing only one copy of the character owned, unlocks a completely separate second Ultimate for a handful of characters. It’s a different ability, not a bigger number on the one they already have. Jotaro Kujo’s second Ultimate, Time Stop, is the best-known example; among the selector-pool ten, five stand out.
Giorno Giovanna’s Ability unlock, Consciousness Rampage, hits for 1,600% Attack with a 70% chance to Incapacitate the target for 5 seconds, and an Incapacitated target takes 80% more damage on top. That’s real single-target damage and a genuine boost for boss-scoring content like Guild Boss, on a character most people only build as a healer.
Caesar Anthonio Zeppeli’s second Ultimate, Bubble Lenses, is a single-target nuke, distinct from the AoE his base kit leans on.
Ermes Costello’s second Ultimate, Hypersonic Harpoon, is not a damage spike: it dashes to your lowest-HP ally, shields them for 1,800 to 2,400% of her Defense, and carries an 80 to 100% chance to stun everything within 1 tile for 4 seconds. If you’re building her as the S+ tank she already is, this is a defensive tool worth reaching for early.
Bruno Bucciarati’s second Ultimate, Zipper Space, deals 1,800 to 2,200% Attack and banishes the target for 5 seconds (untargetable, though DoTs still tick), or converts into a straight execute against a lone last enemy. It’s the tool behind his PvP standing.
Diavolo’s second Ultimate, Finished Now, is lower priority than the other three. It hits for a flat 1,800 to 2,200% Attack no matter what, so it’s never a dead upgrade, that base alone already beats his first Ultimate’s damage. On top of that, against a target he’s marked Isolated (automatic against any solo enemy, including the World Boss), it adds up to another 500% Attack in bonus damage that scales with how much HP the target is missing. That bonus is what makes it a real execute, and it’s strongest against an already-wounded target or in PvP, not on a fresh pull, which is the case for treating it as the fourth pick rather than a peer to the other three.
Outside these four, second-Ultimate value is character by character, and none of it matters until you’ve already got the Star rank to use the rest of a character’s kit.
The bigger picture
Whichever ladder you spend first for one of these ten, both eventually cap together: the later half of the Stand ladder won’t even unlock until you’ve also reached ★6 on the Star rank side. So a second-Ultimate priority only decides which stretch you feel the benefit of first, not which ladder you can skip entirely. See Star Rank Costs for exactly how many duplicates that takes.
Related
- Star Rank Costs: the exact duplicate cost of every star.
- Investment Guide: how Star rank fits alongside a character’s other progression layers.